A friend of mine recently asked if I am still posting
recipes...I haven't been obviously...but I need to! I have tried so many
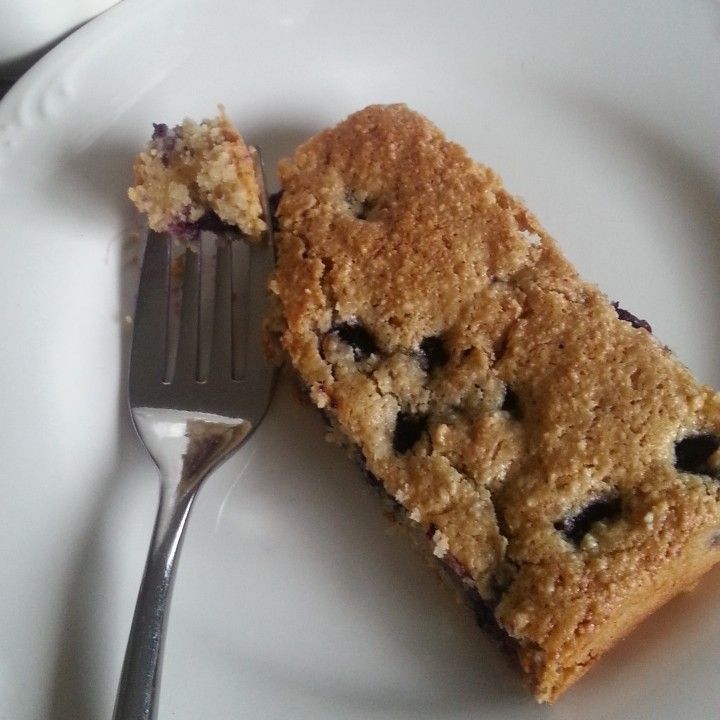
fabulous new recipes the last year or so. Like these paleo blueberry scones (I used the new cashew meal from Trader Joes instead of grinding my own)-
And one that we have repeated over and over is a fabulous recipe from my friend Deborah-
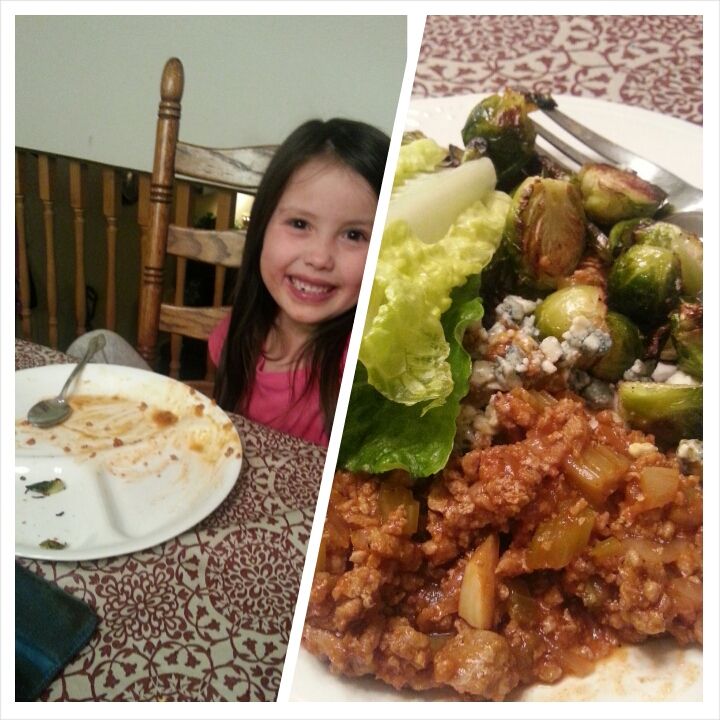
Buffalo Turkey Sloppy Joes (which we eat in lettuce wraps instead of bread-scroll down for the recipe). We had them with some roasted brussels sprouts and blue cheese crumbles in this photo (the kids love this meal, too!):
I love cooking but I find that the recipes I make need to be quicker and easier these days! I am also trying really hard to feed us healthy, clean, fresh foods. We try to avoid any convenience foods. We use lots and lots of fresh veggies (I really don't like frozen or canned! Well, except Trader Joe's frozen green beans...the skinny ones...they are awesome and convenient!) I have also been eating gluten free for about a year and a half and have a tendency toward "paleo" meals. I'm not strict with the paleo thing...I just more use it as a guide to remember to eat lots of fruits, veggies and lean proteins. We eat some grains but try to limit them.
So anyway...I rambled on about that long enough! I will try to start sharing more of the yummy meals we make. unfortunately, they tend to be less like "recipes" in the traditional sense and more like methods of preparation for the fresh foods we eat. Does that make any sense? When I do look for recipes, I love to try new ones from some of these sites-
www.inspiralized.com (LOVE my spiralizer!)
www.paleomg.com
www.againstallgrain.com
www.civilizedcavemancooking.com
And here's a new recipe for you to try. This is great as leftovers. We have also had it on top of cauliflower "rice" and it's delicious. Hubs and I always add extra hot sauce to our servings.
Buffalo Turkey "Sloppy Joe" Lettuce Wraps:
(Serve on buns as Sloppy Joes if you prefer)
1-2 lbs. extra-lean ground turkey
4 celery ribs, chopped
1 medium onion, chopped
2 medium carrots, chopped
3 garlic cloves, minced
1 can (8 oz.) tomato sauce
1/2 cup reduced-sodium chicken broth
1/4 cup hot sauce (we like the Frank's buffalo wing sauce)
2 tablespoons brown sugar
2 tablespoons red wine vinegar
1 tablespoon Worcestershire sauce
1/4 teaspoon pepper
1 cup (4 oz.) crumbled blue cheese, optional
Lots of lettuce to scoop up the meat to eat! The kids totally dig loading up their own leaves.
Directions:
Cook the first five ingredients in a Dutch oven over medium heat until chicken is no longer pink. Stir in the tomato sauce, chicken broth, hot sauce, brown sugar, vinegar, Worcestershire sauce and pepper; heat through. Serve on buns; sprinkle with cheese if desired.
Well, my friends, I hope you give one of these recipes a try. I promise to share more soon. I feel like besides scrapping and running the kids around, all I do is go to the gym and cook (and EAT!). So I have loads to share with you all.
Chat soon!
Stacey
PS Leave me some comments about what you would love to see or read about!! I would be so grateful!
Showing posts with label recipes. Show all posts
Sunday, February 9, 2014
Friday, May 4, 2012
Baked Chicken Sandwiches-Freezer/camping meal
We made these last year from Once a Month Mom's recipe here to take camping. They were a big hit and very yummy.
This time, I added a little extra chicken and celery and stretched it into two bags. Each bag has five 1/3 cup servings in it. I will take the bag out of the freezer, put it into the camping fridge to defrost and then put the sandwiches together before cooking them.
(I will try to update after we eat these and I get a photo!)
Baked Chicken Sandwiches
(includes my updates)
Ingredients:
2-3 cups Chicken (or Turkey), cooked & cubed
6-8 ounces Cheese, shredded (I used a Mexican blend)
1/2 cup Mayonnaise
2-3 cups Celery, diced very small
2 Tablespoons Onion, minced
Salt and pepper to taste
10 Hamburger Buns
Directions:
In a bowl mix all ingredients (except buns). Season to taste. Divide into one or two freezer bags (I divided it up for two separate meals for us). Press out all of the air and double bag your bags to prevent freezer burn. You could bag it up along with five buns if you wanted to be fully prepared. Freeze.
To prepare:
Defrost in the fridge. Add approximately 1/3 cup of chicken mixture onto each bun, wrap in aluminum foil, bake at 350 degrees for 20 minutes. Alternatively, I bet you could cook these on a grill (covered). Be sure to turn them often if using a grill!
Servings: 10 (or 5 per meal)
This time, I added a little extra chicken and celery and stretched it into two bags. Each bag has five 1/3 cup servings in it. I will take the bag out of the freezer, put it into the camping fridge to defrost and then put the sandwiches together before cooking them.
(I will try to update after we eat these and I get a photo!)
Baked Chicken Sandwiches
(includes my updates)
Ingredients:
2-3 cups Chicken (or Turkey), cooked & cubed
6-8 ounces Cheese, shredded (I used a Mexican blend)
1/2 cup Mayonnaise
2-3 cups Celery, diced very small
2 Tablespoons Onion, minced
Salt and pepper to taste
10 Hamburger Buns
Directions:
In a bowl mix all ingredients (except buns). Season to taste. Divide into one or two freezer bags (I divided it up for two separate meals for us). Press out all of the air and double bag your bags to prevent freezer burn. You could bag it up along with five buns if you wanted to be fully prepared. Freeze.
To prepare:
Defrost in the fridge. Add approximately 1/3 cup of chicken mixture onto each bun, wrap in aluminum foil, bake at 350 degrees for 20 minutes. Alternatively, I bet you could cook these on a grill (covered). Be sure to turn them often if using a grill!
Servings: 10 (or 5 per meal)
Monday, April 9, 2012
Crockpot-Taco Lentils and Rice
This is a really easy, tasty and inexpensive recipe. We usually eat this as a burrito filling but it would be good as a side dish as well.
Crockpot-Taco Style Lentils and Rice
(From Hillbilly Housewife...I have changed the spices to suit our tastes better. Adjust to your liking.)
4 cups water
4 beef bouillon cubes
1 teaspoon chili powder
1 teaspoon cumin
1 ½ teaspoon onion powder
1/4 teaspoon garlic powder
Crockpot-Taco Style Lentils and Rice
(From Hillbilly Housewife...I have changed the spices to suit our tastes better. Adjust to your liking.)
3/4 cup dry lentils
3/4 cup brown rice4 cups water
4 beef bouillon cubes
1 teaspoon chili powder
1 teaspoon cumin
1 ½ teaspoon onion powder
1/4 teaspoon garlic powder
Rinse the lentils and rice. Combine everything and cook in the crock pot on low for about 5-6 hours. Stir well. Use as a taco or burrito filling. YUM!
Tuesday, March 20, 2012
Chicken Parmesan (healthy!)
We have made this many times and it is excellent! The kids love it. I love it. Hubby loves it. You need to try it so you can love it, too!
1 lb uncooked boneless, skinless chicken breasts, thinly pounded (4- 4 oz pieces)
2 large egg whites, lightly beaten
½ cup dried bread crumbs (premade or grind a couple of slices of bread to a fine consistency.)
1 TBS Italian seasoning (more or less to your taste)
½ tsp salt
1 tsp olive oil
1 ½ cups spaghetti sauce (whatever kind you like! Homemade, jarred, etc. or even just spiced up tomato sauce)
½ cup shredded mozzarella cheese
1 TBS grated parmesan cheese
Place egg whites in a shallow bowl. Combine bread crumbs with Italian seasoning and salt; pour into another shallow bowl. Dip chicken in egg whites; turn to coat. Dip chicken in bread crumb mixture; turn to thoroughly coat.
Coat a large skillet with cooking spray and add oil; heat over medium-high heat. When hot, add chicken and cook until lightly browned and no longer pink in center, about 4 minutes per side.
Pour 1/2 cup of sauce into prepared baking dish; place chicken in dish and pour remaining sauce evenly over chicken. Sprinkle with cheeses and bake until chicken is cooked through and cheese is bubbly, about 25 minutes.
**I like to have this with just a big salad. It would be great with pasta as well. I usually double this since we love it and the leftovers are great as well.
Chicken Parmigiana
(makes 4 servings)1 lb uncooked boneless, skinless chicken breasts, thinly pounded (4- 4 oz pieces)
2 large egg whites, lightly beaten
½ cup dried bread crumbs (premade or grind a couple of slices of bread to a fine consistency.)
1 TBS Italian seasoning (more or less to your taste)
½ tsp salt
1 tsp olive oil
1 ½ cups spaghetti sauce (whatever kind you like! Homemade, jarred, etc. or even just spiced up tomato sauce)
½ cup shredded mozzarella cheese
1 TBS grated parmesan cheese
Instructions:
Preheat oven to 350ºF. Coat an 8-inch square pan with cooking spray.Place egg whites in a shallow bowl. Combine bread crumbs with Italian seasoning and salt; pour into another shallow bowl. Dip chicken in egg whites; turn to coat. Dip chicken in bread crumb mixture; turn to thoroughly coat.
Coat a large skillet with cooking spray and add oil; heat over medium-high heat. When hot, add chicken and cook until lightly browned and no longer pink in center, about 4 minutes per side.
Pour 1/2 cup of sauce into prepared baking dish; place chicken in dish and pour remaining sauce evenly over chicken. Sprinkle with cheeses and bake until chicken is cooked through and cheese is bubbly, about 25 minutes.
**I like to have this with just a big salad. It would be great with pasta as well. I usually double this since we love it and the leftovers are great as well.
Cauliflower rice!
I can't believe I haven't tried this earlier...so good and healthy! Even my six year old liked it (and he was quite against "cauliflower rice" at first.) I have seen several recipes for this rice substitute around Pinterest. Here is what I did:
Cauliflower "Rice"
Ingredients:
1/2- whole head of washed and dried cauliflower
A handful of diced onion
a clove of garlic (minced)
*(Next time, I think I might try just some garlic and onion powder to see if I like it without the chunks of onion. But it was really good this way, too!)
Cooking spray
Directions:
~Pulse cauliflower in a food processor until about the consistency of rice (actually, it's more like couscous). Make sure your cauliflower is good and dry! Do not add any water at any point.
~Put "rice" into a microsafe bowl and lightly cover (don't seal it tightly) with wax paper or lid. ~Microwave for about 1 1/2 minutes, stirring halfway. (Again, do not add water!)
~Saute your onions and garlic with a bit of cooking spray in a large non-stick skillet. Add your rice and cook for a couple of minutes, stirring frequently.
~Serve as you would rice and enjoy far less calories!!!
(We had this with Kielbasa and black beans...can't wait to try it with an Asian dish!)
Cauliflower "Rice"
Ingredients:
1/2- whole head of washed and dried cauliflower
A handful of diced onion
a clove of garlic (minced)
*(Next time, I think I might try just some garlic and onion powder to see if I like it without the chunks of onion. But it was really good this way, too!)
Cooking spray
Directions:
~Pulse cauliflower in a food processor until about the consistency of rice (actually, it's more like couscous). Make sure your cauliflower is good and dry! Do not add any water at any point.
~Put "rice" into a microsafe bowl and lightly cover (don't seal it tightly) with wax paper or lid. ~Microwave for about 1 1/2 minutes, stirring halfway. (Again, do not add water!)
~Saute your onions and garlic with a bit of cooking spray in a large non-stick skillet. Add your rice and cook for a couple of minutes, stirring frequently.
~Serve as you would rice and enjoy far less calories!!!
(We had this with Kielbasa and black beans...can't wait to try it with an Asian dish!)
Wednesday, January 4, 2012
Peanut noodles- recipe!
Of course, I forgot to take a photo of this tonight! But this sauce is really yummy...try it out sometime. :)
I just use whatever noodles I have on hand. Tonight it was Lo mein noodles that have been sitting in my pantry forever. But I usually just use spaghetti noodles. :) Add in whatever veggies you have on hand (steam them first) and some leftover turkey or chicken for a full meal.
Peanut Noodles (just the sauce)
1/3 cup peanut butter (I used reduced fat)
1/4 cup warm water
1/4 cup chopped fresh cilantrro (I have left this out in a pinch but it really adds a good flavor)
1/2 tsp ground ginger (or use a tbs freshly grated if you have it! I never do.)
1 TBS rice vinegar
1 TBS soy sauce
1 minced garlic clove
1 TBS packed brown sugar
Directions: blend everything together and pour over cooked noodles and veggies. This will cover about half a pound of cooked noodles. Enjoy!
I just use whatever noodles I have on hand. Tonight it was Lo mein noodles that have been sitting in my pantry forever. But I usually just use spaghetti noodles. :) Add in whatever veggies you have on hand (steam them first) and some leftover turkey or chicken for a full meal.
Peanut Noodles (just the sauce)
1/3 cup peanut butter (I used reduced fat)
1/4 cup warm water
1/4 cup chopped fresh cilantrro (I have left this out in a pinch but it really adds a good flavor)
1/2 tsp ground ginger (or use a tbs freshly grated if you have it! I never do.)
1 TBS rice vinegar
1 TBS soy sauce
1 minced garlic clove
1 TBS packed brown sugar
Directions: blend everything together and pour over cooked noodles and veggies. This will cover about half a pound of cooked noodles. Enjoy!
Sunday, January 1, 2012
Good Luck Dip for 2012!
Need a yummy way to eat your black eyed peas today for good luck in 2012?
My grandma (or "Poolma" as I nicknamed her as a young child since she was the grandma with the pool. The name stuck and we all called her "Poolma!!") would always make some black eyed peas on New Year's Day and we would be obligated to eat them. I don't think I liked them much as a kid...but I knew they were essential for a good new year. ;)
I had a bag of frozen black eyed peas (from the same friend mentioned in my garbanzo bean soup recipe below!) and decided to make something a little different that I thought my family would be likely todevour eat.
DIP! Who doesn't love a good dip?? This is sort of like 7 layer bean dip...but fresher and yummier. ;) So make this...today! Or tomorrow if you have to go to the store. Better late than never. My family could use a little good luck in the upcoming year...what about your family? :) The great thing about this dip is that you can make it to your preferences...add guacamole or black olives, take out the cilantro, etc. Make it yours, make it YUMMY...just make it!
2012 Good Luck Dip
Black eyed peas (canned, frozen and defrosted or dried and cooked)- about 2 cups
1-2 tsp cumin
Sour cream- (I didn't measure...maybe 1/2 a cup or more)
1 TBS taco seasoning (optional)
Salsa
Lettuce- chopped (about a cup...up to you!)
Cilantro- chopped (maybe 1/4 cup...as much as you would like)
Chopped fresh tomatoes
Shredded cheese (We like it finely shredded for this.)
Chopped green onions (about four)
Directions:
1. Drain your black eyed peas well and mix with some cumin to give them a better flavor ;) .
2. Mash up about half of the peas. I used a hand blender, but a fork and some elbow grease would work as well. Spread peas out on a platter.
3. Mix sour cream with some taco seasoning and spread out over peas.
4. Spread enough salsa out over the sour cream to cover it with a thin layer.
5. Add some shredded lettuce and cilantro. I like to chop the two together so the cilantro flavor gets all through the lettuce. (I do this for our tacos, too...YUM!)
6. Add your shredded cheese, then the chopped tomatoes and lastly the green oinions.
Serve with tortilla chips and ENJOY the good luck you will receive in the NEW YEAR. :)
Happy New Year everyone!!! I hope you all have a fabulous 2012!! :)
Love and blessings to you and your family.
Stacey
My grandma (or "Poolma" as I nicknamed her as a young child since she was the grandma with the pool. The name stuck and we all called her "Poolma!!") would always make some black eyed peas on New Year's Day and we would be obligated to eat them. I don't think I liked them much as a kid...but I knew they were essential for a good new year. ;)
I had a bag of frozen black eyed peas (from the same friend mentioned in my garbanzo bean soup recipe below!) and decided to make something a little different that I thought my family would be likely to
DIP! Who doesn't love a good dip?? This is sort of like 7 layer bean dip...but fresher and yummier. ;) So make this...today! Or tomorrow if you have to go to the store. Better late than never. My family could use a little good luck in the upcoming year...what about your family? :) The great thing about this dip is that you can make it to your preferences...add guacamole or black olives, take out the cilantro, etc. Make it yours, make it YUMMY...just make it!
2012 Good Luck Dip
Black eyed peas (canned, frozen and defrosted or dried and cooked)- about 2 cups
1-2 tsp cumin
Sour cream- (I didn't measure...maybe 1/2 a cup or more)
1 TBS taco seasoning (optional)
Salsa
Lettuce- chopped (about a cup...up to you!)
Cilantro- chopped (maybe 1/4 cup...as much as you would like)
Chopped fresh tomatoes
Shredded cheese (We like it finely shredded for this.)
Chopped green onions (about four)
Directions:
1. Drain your black eyed peas well and mix with some cumin to give them a better flavor ;) .
2. Mash up about half of the peas. I used a hand blender, but a fork and some elbow grease would work as well. Spread peas out on a platter.
3. Mix sour cream with some taco seasoning and spread out over peas.
4. Spread enough salsa out over the sour cream to cover it with a thin layer.
5. Add some shredded lettuce and cilantro. I like to chop the two together so the cilantro flavor gets all through the lettuce. (I do this for our tacos, too...YUM!)
6. Add your shredded cheese, then the chopped tomatoes and lastly the green oinions.
Serve with tortilla chips and ENJOY the good luck you will receive in the NEW YEAR. :)
Happy New Year everyone!!! I hope you all have a fabulous 2012!! :)
Love and blessings to you and your family.
Stacey
Wednesday, December 28, 2011
Yummy soup recipe! (Garbanzo beans....of all things!!)
A good friend of mine who lives just a couple of blocks away likes to pawn off give organic foods her family won't touch to me. (Her hubby gets free samples all the time with his job....fun!)
Well, I decided to use a rock solid bag of garbanzo beans from her that was sitting in my freezer. I found a couple of blended soup recipes online but they had ingredients I didn't have (or even usually buy) so I made up my own simple recipe. Guess what?? It is TASTY and very satisfying.
I love eating a bowl of soup for lunch to keep my calories down (I am a night eater!!). This was yummy and I have three more bowls waiting in the fridge. ;)

Garbanzo Bean Soup
Makes six 1 cup servings (I divided mine into four 1 1/2 cup servings)
16 ounces frozen garbanzo beans (or 2 1/2 cups cooked garbanzo beans)
4 cups chicken broth (I used one of those boxed cartons of broth)
2 cloves of garlic-chopped
1 small-medium onion chopped
Extra Virgin Olive Oil
Wedge of lemon
Directions:
Simmer beans, broth, garlic and onion in a large pot for about 30 minutes (with the lid on). Puree everything together (I used my immersion hand blender but you can do it in a blender in batches...be careful!!!). Add salt and pepper to taste.
Now, it was okay just like this. BUT...olive oil and lemon made it super yummy! Even my six year old son said how good the olive oil was drizzled on it.
Top with a drizzle of extra virgin olive oil (I used 1/2 tsp on my bowl) and a small squeeze of fresh lemon.
Calories (without the oil) in ONE CUP- 158
1/2 tsp EVOO- 20 calories extra (well worth it!)
Well, I decided to use a rock solid bag of garbanzo beans from her that was sitting in my freezer. I found a couple of blended soup recipes online but they had ingredients I didn't have (or even usually buy) so I made up my own simple recipe. Guess what?? It is TASTY and very satisfying.
I love eating a bowl of soup for lunch to keep my calories down (I am a night eater!!). This was yummy and I have three more bowls waiting in the fridge. ;)

Garbanzo Bean Soup
Makes six 1 cup servings (I divided mine into four 1 1/2 cup servings)
16 ounces frozen garbanzo beans (or 2 1/2 cups cooked garbanzo beans)
4 cups chicken broth (I used one of those boxed cartons of broth)
2 cloves of garlic-chopped
1 small-medium onion chopped
Extra Virgin Olive Oil
Wedge of lemon
Directions:
Simmer beans, broth, garlic and onion in a large pot for about 30 minutes (with the lid on). Puree everything together (I used my immersion hand blender but you can do it in a blender in batches...be careful!!!). Add salt and pepper to taste.
Now, it was okay just like this. BUT...olive oil and lemon made it super yummy! Even my six year old son said how good the olive oil was drizzled on it.
Top with a drizzle of extra virgin olive oil (I used 1/2 tsp on my bowl) and a small squeeze of fresh lemon.
Calories (without the oil) in ONE CUP- 158
1/2 tsp EVOO- 20 calories extra (well worth it!)
Monday, June 20, 2011
Cowboy Caviar
To be honest, I didn't make this recently...but I need to make it again soon! I was looking back through my pictures and I realized I haven't shared this. It makes a yummy appetizer (or you could even have a big bowl of it for a meal!). We ate this with tortilla chips...yum!
Cowboy Caviar
1 can corn, drained and rinsed
1 can black beans , drained and rinsed
2 tomatoes diced
1-2 avocados, diced
1 green pepper diced
1 red pepper diced
½ onion diced
Cilantro to taste
Sauce:
¼ c. olive oil (try using less for less points?)
¼ c. red wine vinegar or apple cider vinegar
2 garlic cloves
1 lime squeezed
1 tsp. cumin
Pepper to taste
Mix sauce ingredients then toss with everything else. Adjust seasonings to taste.
Cowboy Caviar
1 can corn, drained and rinsed
1 can black beans , drained and rinsed
2 tomatoes diced
1-2 avocados, diced
1 green pepper diced
1 red pepper diced
½ onion diced
Cilantro to taste
Sauce:
¼ c. olive oil (try using less for less points?)
¼ c. red wine vinegar or apple cider vinegar
2 garlic cloves
1 lime squeezed
1 tsp. cumin
Pepper to taste
Mix sauce ingredients then toss with everything else. Adjust seasonings to taste.
Sunday, May 15, 2011
Roasted Tomatillo Salsa
Lately, I have been signing up to get a big basket of fresh produce each week from Bountiful Baskets. It's a lot of fun because it's a great price ($15 for two baskets full), I am always surprised by what's inside and we get to try new and different things. This time, I added a Mexican pack and tortillas (cost was extra).
Here's everything I got this week:
This morning I thought I'd try out roasting those tomatillos (and one of the anaheim peppers!). Here's the yummy salsa recipe I came up with.
Roasted Tomatillo Salsa
8-10 tomatillos (husked and rinsed)
1 anaheim pepper (optional)
1 small onion, roughly chopped
2 garlic cloves, minced
large handful of cilantro leaves and tender stems
1/2- 1 jalepeno, stem and seeds removed
1/2 tsp sugar
1/2 tsp each salt and pepper
To roast the tomatillos and pepper, preheat broiler on high. Roast for about 4 minutes on each side or until blackened (keep an eye on them!!!). Remove and allow the tomatillos to cool. Put the pepper in a ziplock bag for 5-10 minutes to steam. Peel the pepper and remove stem and seeds.
Cut away the tough stem area on the tomatillos. Add everything to a blender or food processor. Blend. Taste and adjust seasonings.
Enjoy! Off to make some quesadillas with our new fresh tortillas!
Wednesday, April 27, 2011
White bread recipe
We are usually wheat bread eaters here. Not that I don't like white bread...I guess I feel that wheat bread is better for us so that's what we eat. Honestly, I have rarely met a bread I didn't like. :)
Anyhow, this recipe makes for some yummy white bread...which is great plain, with butter or even better- as French Toast! (I will share that recipe tomorrow.) I hope you will give this recipe a try. As with any bread, adjust the liquid and flour slightly to make sure the consistency is right...not too wet or dry. I make this in my Kitchen Aid mixer with the dough hook, but you could do it by hand as well. I have no idea if this will work well in a bread maker. If you try it, let us know!
I doubled this recipe for two fluffy loaves to make lots of French Toast for the freezer (perfect camping food!)
White Bread
1 1/4 cups lukewarm milk
3 ½ cups all-purpose flour
1 1/2 tablespoons white sugar
1 1/2 teaspoons salt
2 tablespoons butter
2 teaspoons active dry yeast Directions: Combine the milk, sugar and yeast. Let sit a few minutes until foamy. Combine flour and salt in another bowl and whisk together. Add the butter (melted) to the milk and stir. Add flour and salt to the milk and knead for about 5 minutes. Cover and let rise for 30 minutes. Punch down, place in a loaf pan, cover and let rise for 25 minutes.
Meanwhile, heat oven to 350. Bake for 25 minutes.
Enjoy!!!
Thursday, August 12, 2010
Chicken Taquitos and Refried Bean Soup - WW recipes
Here are a couple of tasty and low point recipes. These are great together (dip the taquitos in the soup) or separately.
Chicken Taquitos- From Hungry Girl
MAKES 4 SERVINGS 4 pts for 2 taquitos
Ingredients:
8 small (6-inch) yellow corn tortillas
One 9.75-oz. (or 10-oz.) can 98% fat-free chunk white chicken breast in water, drained well
1/2 cup salsa
1/3 cup shredded fat-free cheddar cheese
1/4 tsp. dry taco seasoning mix
Optional: red enchilada sauce, additional salsa, fat-free sour cream, for dipping
Directions:
Preheat oven to 375 degrees.
~In a medium bowl, combine the chicken and salsa, and mix thoroughly. Cover and refrigerate for 15 minutes.
~Remove chicken mixture from the fridge, and drain any excess liquid. Add cheese and taco seasoning, and mix to combine. This is your filling. Set aside.
~Prepare a baking sheet by spraying with nonstick spray, and set it aside.
~Dampen two paper towels, and place tortillas between them. Microwave for about 1 minute, until tortillas are warm and pliable.
~Take one tortilla (keep the rest between the paper towels), spray both sides lightly with nonstick spray, and lay it flat on a clean dry surface. Spoon about 2 heaping tbsp. of filling onto the tortilla. Spread it evenly across the entire surface, and roll tortilla up tightly, so that you have a cigar-shaped tube. Secure with toothpicks and place seam-side down on the baking sheet. Repeat with remaining tortillas and filling.
~Bake for 14 - 16 minutes, until crispy. Allow taquitos to cool for 5 minutes. If you like, dunk in enchilada sauce, salsa, or sour cream!
Refried Bean Soup
WW Points: 1 point per Cup (10 servings)
2 (14.5 oz) cans diced tomatoes with green chiles
2 cloves garlic, minced
1 cup onion, finely chopped
2 cans fat free refried beans
3 cups fat free chicken broth, divided
Directions:
1. Combine tomatoes, garlic, onion, and 1 cup of broth in a large pan; boil for five minutes, stirring often. (I like to blend the tomatoes up so there are less chunks.)
2. Stir in beans and remaining 2 cups broth; simmer over low heat for 20 minutes, stirring often.
I got this recipe from-http://thematzats.blogspot.com/
Enjoy!!! Happy Cooking!!!
Chicken Taquitos- From Hungry Girl
MAKES 4 SERVINGS 4 pts for 2 taquitos
Ingredients:
8 small (6-inch) yellow corn tortillas
One 9.75-oz. (or 10-oz.) can 98% fat-free chunk white chicken breast in water, drained well
1/2 cup salsa
1/3 cup shredded fat-free cheddar cheese
1/4 tsp. dry taco seasoning mix
Optional: red enchilada sauce, additional salsa, fat-free sour cream, for dipping
Directions:
Preheat oven to 375 degrees.
~In a medium bowl, combine the chicken and salsa, and mix thoroughly. Cover and refrigerate for 15 minutes.
~Remove chicken mixture from the fridge, and drain any excess liquid. Add cheese and taco seasoning, and mix to combine. This is your filling. Set aside.
~Prepare a baking sheet by spraying with nonstick spray, and set it aside.
~Dampen two paper towels, and place tortillas between them. Microwave for about 1 minute, until tortillas are warm and pliable.
~Take one tortilla (keep the rest between the paper towels), spray both sides lightly with nonstick spray, and lay it flat on a clean dry surface. Spoon about 2 heaping tbsp. of filling onto the tortilla. Spread it evenly across the entire surface, and roll tortilla up tightly, so that you have a cigar-shaped tube. Secure with toothpicks and place seam-side down on the baking sheet. Repeat with remaining tortillas and filling.
~Bake for 14 - 16 minutes, until crispy. Allow taquitos to cool for 5 minutes. If you like, dunk in enchilada sauce, salsa, or sour cream!
Refried Bean Soup
WW Points: 1 point per Cup (10 servings)
2 (14.5 oz) cans diced tomatoes with green chiles
2 cloves garlic, minced
1 cup onion, finely chopped
2 cans fat free refried beans
3 cups fat free chicken broth, divided
Directions:
1. Combine tomatoes, garlic, onion, and 1 cup of broth in a large pan; boil for five minutes, stirring often. (I like to blend the tomatoes up so there are less chunks.)
2. Stir in beans and remaining 2 cups broth; simmer over low heat for 20 minutes, stirring often.
I got this recipe from-http://thematzats.blogspot.com/
Enjoy!!! Happy Cooking!!!
Monday, May 10, 2010
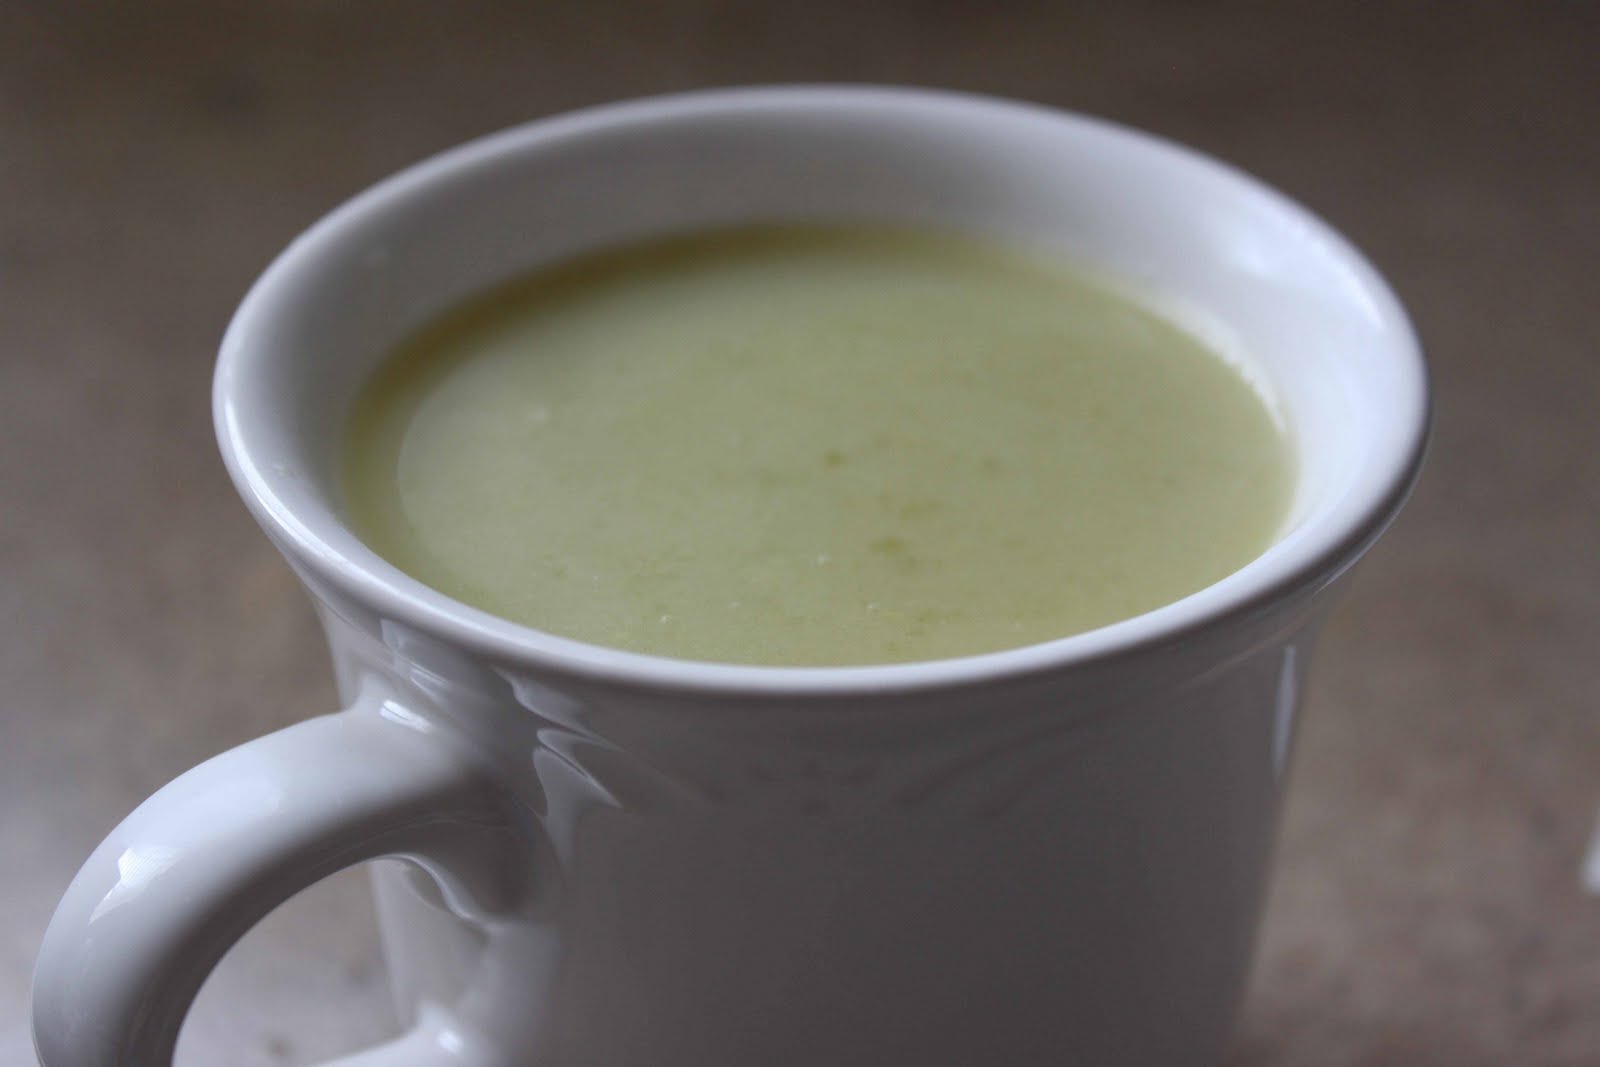
Cauliflower soup
Here's another super low point yet tasty and filling soup. I found the recipe for this here- http://www.skinnytaste.com/2008/03/cauliflower-soup-0-ww-pts.html
I really don't make it different from her recipe...except I usually just make enough for me at lunch. I never measure anything...just eyeball it. Easy peasy! This is creamy and really good!
Cauliflower soup
WW- 0 pts (yippeee!!)
Chopped cauliflower (a couple of large handfuls)
Diced onion (small handful...maybe 1/8- 1/4 cup)
Chicken broth to almost cover the veggies (don't add too much...you can always add more later if it needs thinned out)
Salt and pepper to taste.
Directions: Simmer everything for about 20-30 minutes in a small covered saucepan. Blend until smooth. (I use my immersion blender for this but you can very carefully blend it in a regular blender.) Enjoy!
I really don't make it different from her recipe...except I usually just make enough for me at lunch. I never measure anything...just eyeball it. Easy peasy! This is creamy and really good!
Cauliflower soup
WW- 0 pts (yippeee!!)
Chopped cauliflower (a couple of large handfuls)
Diced onion (small handful...maybe 1/8- 1/4 cup)
Chicken broth to almost cover the veggies (don't add too much...you can always add more later if it needs thinned out)
Salt and pepper to taste.
Directions: Simmer everything for about 20-30 minutes in a small covered saucepan. Blend until smooth. (I use my immersion blender for this but you can very carefully blend it in a regular blender.) Enjoy!
Friday, April 30, 2010
Herbed Lemon Chicken-recipe
When my friend Melanie visited us in Utah, she made this yummy chicken for us. Ever since then, I have been after her to send me the recipe and she couldn't find it anywhere! So I finally got an email a couple of weeks ago from her...she found it! Yay! This is quite peppery so if you don't like pepper, you might want to use a regular lemon seasoning instead of the lemon pepper. But Jeremy and I love this...and so do the kids (although I scraped off some of the seasoning from their pieces). I hope you enjoy it!
Herbed Lemon Chicken
WW- Makes 4 servings @ 3 points per serving
2 Tbsp. Ms. Dash Lemon Pepper seasoning
1 Tbsp. all-purpose flour
12 ounces of boneless, skinless chicken breast
1 Tbsp. unsalted butter
½ medium lemon
1 c. low sodium chicken broth
1. On a large plate, combine lemon pepper seasoning and flour; pat chicken Dry and roll in mixture.
2. Heat butter in large skillet; add chicken And brown on both sides (about 3 minutes each side).
3. Meanwhile; remove zest from lemon; squeeze juice from lemon and mix zest and juice w/chicken broth.
4. Pour over chicken , cover and cook for 15 minutes. Remove lid and cook for a further five minutes or until juices run clear. (I kept the lid on until it was cooked...took about 20-25 minutes for me.) Serve immediately. The juice is so yummy poured over veggies and quinoa (or rice). :)
Thanks Melanie!!!!
Happy cooking & eating!
Stacey
Herbed Lemon Chicken
WW- Makes 4 servings @ 3 points per serving
2 Tbsp. Ms. Dash Lemon Pepper seasoning
1 Tbsp. all-purpose flour
12 ounces of boneless, skinless chicken breast
1 Tbsp. unsalted butter
½ medium lemon
1 c. low sodium chicken broth
1. On a large plate, combine lemon pepper seasoning and flour; pat chicken Dry and roll in mixture.
2. Heat butter in large skillet; add chicken And brown on both sides (about 3 minutes each side).
3. Meanwhile; remove zest from lemon; squeeze juice from lemon and mix zest and juice w/chicken broth.
4. Pour over chicken , cover and cook for 15 minutes. Remove lid and cook for a further five minutes or until juices run clear. (I kept the lid on until it was cooked...took about 20-25 minutes for me.) Serve immediately. The juice is so yummy poured over veggies and quinoa (or rice). :)
Thanks Melanie!!!!
Happy cooking & eating!
Stacey
Wednesday, April 21, 2010
Porcupine Meatballs
Yum! Who doesn't love meatballs?? These are great alone or with a gravy or dipping sauce(maybe ketchup or BBQ sauce). Since they have rice in them, you don't really need rice or potatoes on the side...just a nice big salad or other veggie. (Ok, who am I kidding...we had mashed potatoes with them but some bread would be good, too. LOL)
7 points using 90% beef, 6 points if using 95% beef
1 lb ground beef (90 % or better)
2 cups fully cooked rice (I used brown rice)
1 cup shredded lowfat cheese (I used Kraft 2%)
1 tsp Italian seasoning
½ tsp each garlic powder, salt, pepper
Directions: Combine all ingredients and roll into meatballs. Bake at 350 for 35-40 minutes or until fully cooked.
Source- I got this recipe here but I made a couple of changes. I felt like 3 cups of rice was too much so I made them with 2 cups and 3/4 lb ground beef. But everyone wanted another meatball or two so this time I upped the recipe to 1 lb and kept the other things the same. I am not sure about adding more rice to stretch it to more meatballs. You could try that. I also chose to use 2% shredded cheese to lower the points. Feel free to experiment with spices and cheeses. :)
Happy eating!
Stacey
Porcupine Meatballs
WW- 5 meatballs (recipe makes 25 total) 7 points using 90% beef, 6 points if using 95% beef
1 lb ground beef (90 % or better)
2 cups fully cooked rice (I used brown rice)
1 cup shredded lowfat cheese (I used Kraft 2%)
1 tsp Italian seasoning
½ tsp each garlic powder, salt, pepper
Directions: Combine all ingredients and roll into meatballs. Bake at 350 for 35-40 minutes or until fully cooked.
Source- I got this recipe here but I made a couple of changes. I felt like 3 cups of rice was too much so I made them with 2 cups and 3/4 lb ground beef. But everyone wanted another meatball or two so this time I upped the recipe to 1 lb and kept the other things the same. I am not sure about adding more rice to stretch it to more meatballs. You could try that. I also chose to use 2% shredded cheese to lower the points. Feel free to experiment with spices and cheeses. :)
Happy eating!
Stacey
Tuesday, April 13, 2010
Cream of celery soup - recipe
Here's a low point soup that is tasty and filling. I love to have a cup of a low point veggie soup in the afternoon when the tummy rumbles hit. I have a few others I will share as soon as I get a chance.
Cream of celery soup
Cream of Celery Soup
WW points per cup-1.25
Servings: 4 (one cup each serving)
2 1/2 cup fat-free chicken broth
1 small potato, peeled and diced
2 tsp olive oil
4 large stalk celery, diced
1 cup onion, diced (about 1 small onion)
2 clove garlic clove, minced
Directions: Saute onion in olive oil for a few minutes until soft. Add garlic and cook for another minute or two. Add broth, celery and potato and bring to a boil. Turn to low, add lid and simmer for 25-30 minutes or until vegetables are soft. Blend soup in blender or with an immersion blender until smooth. Season to taste with salt and pepper. Enjoy!
Thursday, April 8, 2010
Curried Lentils - recipe
Here is one of our regular meatless meals. I got the basic recipe for this from Nicole. Here is how I make it....mostly...I taste and add depending on my mood and the curry powder I have. Curry powders are all so different. Some are mild, some are spicy, some are a little sweet. I have added a bit of cumin before and even some hot red curry paste. Make this to suit your taste preferences.
Curried lentils and potatoes
WW – 4 servings @ 5 pts each
1 onion chopped
2 cloves of garlic, minced
1 cup light coconut milk (or more broth if you prefer...but it really doesn't make it taste like coconut...just adds more depth to the flavor)
2.5 cups chicken broth
1 Cup Lentils
1TBS Curry (or more)
2 potatoes peeled and cut in chunks
salt and pepper to taste (add other spices such as cumin or red curry to your taste preferences)
Optional Items:sour cream, cilantro, green onions
2. Wash and pick over lentils. Add lentils, curry powder, coconut milk and broth to the soup pot.
3. Bring to a boil and then cook on med-low for about 10-15 minutes, until lentils start to soften.
4. Bury potatoes under lentils. Put the lid on and simmer without disturbing for ten minutes.
5. Check to see if it's getting too dry, add water or broth if needed. Stir gently and continue to cook until potatoes and lentils are tender.
6. Season to taste with salt and pepper.
This is a thick stew not a soup so if it's soupy take of the lid and keep cooking. Serve on top of rice with sour cream, chopped cilantro and green onions (extra points for the rice and sour cream).
I hope you like this. We have it a couple times a month...Jer really loves curry!
Stacey
Cast iron skillet baked potatoes - recipe
I have a feeling that I will be making a lot of potatoes in my new cast iron skillet in many different ways. This is a super easy and basic recipe that you can use instead of having plain old baked potatoes. This gives the potatoes a yummy golden crunchy top.
Cast Iron Skillet Baked Potatoes
WW points- 2 points for each potato half
Ingredients:
4 medium sized baking potatoes (I used russet but I am sure almost any kind would be good)
4 tsp oil (I used olive oil)
Seasoning to taste (I used Old World Central from the Spice House. It is similar to a seasoning salt but much better. :) Use any sort of seasoning you like that will go well with what you are eating.)
Directions:
1. Scrub and dry your potatoes. Cut them in half lengthwise.
2. Add oil to a COLD cast iron skillet.
3. Sprinkle whatever seasonings you are using evenly over the oil. I didn't measure this. I just sprinkled til it looked like there was enough. I might even add more next time.
4. Place your potatoes, cut side down, in your pan.
5. Put your cold skillet into your cold oven and set it to 400 degrees. After about 15 minutes, turn it down to 350 and cook for another 30-45 minutes until a fork goes easily into the potatoes.
6. Serve with sour cream, cheese, chili....or just eat plain alongside your main dish. So yummy!
Enjoy!
Stacey
Cast Iron Skillet Baked Potatoes
WW points- 2 points for each potato half
Ingredients:
4 medium sized baking potatoes (I used russet but I am sure almost any kind would be good)
4 tsp oil (I used olive oil)
Seasoning to taste (I used Old World Central from the Spice House. It is similar to a seasoning salt but much better. :) Use any sort of seasoning you like that will go well with what you are eating.)
Directions:
1. Scrub and dry your potatoes. Cut them in half lengthwise.
2. Add oil to a COLD cast iron skillet.
3. Sprinkle whatever seasonings you are using evenly over the oil. I didn't measure this. I just sprinkled til it looked like there was enough. I might even add more next time.
4. Place your potatoes, cut side down, in your pan.
5. Put your cold skillet into your cold oven and set it to 400 degrees. After about 15 minutes, turn it down to 350 and cook for another 30-45 minutes until a fork goes easily into the potatoes.
6. Serve with sour cream, cheese, chili....or just eat plain alongside your main dish. So yummy!
Enjoy!
Stacey
Tuesday, March 23, 2010
Trader Joes, a giveaway and a yummy salad dressing recipe.
Check out the great giveaway here- http://mypursuitof.blogspot.com/2010/03/grocery-shopping-with-grom-and-giveaway.html And make sure to watch the fun Trader Joes video. Oh, how I miss being able to shop at TJ's regularly.
With our pizza last night, we tried a new recipe for Asian Vinaigrette. It's a keeper!! So tasty and low in points. Here's the recipe with a slight change to use what I had on hand. (See the photo from yesterday's post.)
Asian Vinaigrette
3 TBS chicken broth
2 TBS rice wine vinegar
1 TBS soy sauce
2 tsp canola oil
2 tsp sesame oil
1 tsp sugar
1/2 tsp ground ginger
Add all ingredients to a small jar, add the lid and shake it well.
This makes 4 servings (almost 2 TBS each serving) @ 1 pt a serving.
We tossed this with some shredded cabbage leftover from St. Patty's Day, some shredded carrots, green onions and toasted sesame seeds. This would also be great on lettuce with diced chicken and mandarin oranges. YUM.
With our pizza last night, we tried a new recipe for Asian Vinaigrette. It's a keeper!! So tasty and low in points. Here's the recipe with a slight change to use what I had on hand. (See the photo from yesterday's post.)
Asian Vinaigrette
3 TBS chicken broth
2 TBS rice wine vinegar
1 TBS soy sauce
2 tsp canola oil
2 tsp sesame oil
1 tsp sugar
1/2 tsp ground ginger
Add all ingredients to a small jar, add the lid and shake it well.
This makes 4 servings (almost 2 TBS each serving) @ 1 pt a serving.
We tossed this with some shredded cabbage leftover from St. Patty's Day, some shredded carrots, green onions and toasted sesame seeds. This would also be great on lettuce with diced chicken and mandarin oranges. YUM.
Monday, March 22, 2010
Pizza Dough recipe
I posted my recipe for pizza dough a long time ago but it was accidentally deleted. No worries, though...I have new and improved directions for you! This is especially for my dear friends who have told me they want to try to make their own dough but haven't been brave enough yet. To you, I say, "Go for it!!" Despite the steps and all of the photos, it is really a simple process and once you make it a couple of times, it will be very easy.
I use this dough for pizza, breadsticks, pizza rolls, focaccia, and calzones. I have used it so many times over the years that I don't even have to look at a recipe. LOL I will share some of those tips and recipes as I make them and take pictures.
*My confession* I usually use my Kitchen Aid mixer with a dough hook to make my pizza dough and breads. But I didn't start out that way. Since I know that many of you might not have a mixer or dough attachment, I am demonstrating how to make your dough by hand. :)
Ingredients needed:
*This recipe will make 2 medium/thin pizza crusts or one really big/thick crust. I usually just half the recipe but I am trying out saving half of the dough in the fridge for another day...I will let you know how that works out.
3 cups flour (I used bread flour today but I have used all purpose for years and it works fine. I also often substitute whole wheat for half of the flour.)
1 cup warm water
1 tsp sugar
1 tsp salt
2 1/4 tsp active dry yeast (or one of those little envelopes of yeast)
2 TBS olive oil
WW points- the whole recipe comes out to 30 points. I use half of the dough for one pizza so if you cut it into 8 slices, each slice will have about 2 points worth of dough. Then you can calculate the rest of your pizza depending on how much cheese and other toppings you add.
Directions:
1. Mix the water and sugar together in a small bowl. Sprinkle the yeast on top of it and let sit for about 5-10 minutes or until it gets foamy.
2. While the yeast is doing it's thing, mix the flour and salt together in a large bowl. When you measure flour, always use something else to scoop the flour into the measuring cup and level it off with a knife. Don't scoop the flour out with your measuring cup or you will end up with too much flour.
Adding and mixing the flour and salt. Use a whisk or a fork to stir the flour mixture and make sure you fluff it up pretty well.
3. Once the yeast has mostly turned to a layer of foam, stir in the olive oil.
4. Add the yeast mixture to the bowl with the flour and salt. Use a large spoon to stir it initially until the wet ingredients start to blend in with the dry stuff.
5. Now use your *clean* hands to finish combining the ingredients. Just scrape the sides of the bowl and squish it all together. This can be a little messy and your dough won't look very pretty yet. As soon as it is all mostly mixed together, dump it out on your work surface.
6. Now you get to KNEAD the dough. If you have never done this, you might be a little intimidated. But trust me, it is easy. And it is a bit theraputic once you get into the "zone" (unless you have little hands trying to get in to help knead it like I normally do.)
To knead the dough, all you do is fold the dough over on itself and press it down. Then you turn it and fold again and press. I usually use two hands to do this (since you need to put a bit of muscle into it) but I had to take a photo with one of them. :) Keep kneading it and kneading it for about 5-10 minutes. You can add a touch more flour if you need to...I added about a 1/2 teaspoon or so.
7. The photo on the left was after 2 minutes of kneading. The one on the right was after about 8 or 9 minutes. Place the dough into a large bowl sprayed with cooking spray and cover it with plastic wrap (also sprayed with cooking spray.) Place the bowl in a warm area for about 20 minutes to rise. I always put mine in the oven after turning it on for 1-2 minutes. (I made the mistake once of forgetting to turn the oven off and ruined the dough...so now I ALWAYS set my timer for 2 minutes so I can remember to shut off the heat.)
8. After the dough has doubled in size, punch it down. (Just press your fist into it and fold it over itself once or twice.) This is when you will want to cut it in half to make your two crusts (or save half for another time.) If you like a really thick crust, then by all means, just use the full amount to create your crust. We like it thinner.
9. Press or roll out the dough to the size you want it. I like to use my hands to do this. I press it out to get the shape going and then I hold it up with two hands and work around the edge to let gravity stretch it out for me. This was really hard to get a photo of since I use two hands to do it so I hope you can understand what I mean.
10. Place the dough on your pan. I don't have to spray my pizza stone since it won't stick (I love my Pampered Chef Stoneware!!) but you might need to spray yours or add a sprinkle or cornmeal under the dough. Oh, by the way, you don't have to make a round pizza! I have made a rectangle shape and used a large cookie sheet as well (you might want to use the whole recipe for that!)
These guys are anxious for dinner...and chomping at the bit to help add toppings!
Turn on your oven to 400 degrees to start heating up while you chop toppings and decorate your dough. It will rise a little more while you are prepping your toppings. I usually set it on top of or next to my oven so the heat can help it along a bit. you can brush some olive oil on the dough or spray it with a little cooking spray to keep the dough moist.
Bake your pizza for about 20 minutes. Now PLEASE PLEASE check your pizza after about 10 minutes and again every few minutes. All ovens are a little different. This is how long it takes MY oven to cook the pizzas how we like them. Yours may cook faster or slower. It also depends on how high you pile your toppings. You certainly don't want a doughy crust and you don't want it to be overcooked. So just keep a close eye on it.
Let your pizza set for a few minutes before cutting it. Enjoy! What are your favorite pizza toppings?
Check out more tasty foods at Tasty Tuesdays!
Stacey
Subscribe to:
Posts (Atom)